How to run a Streamr node
For those looking to earn, running a node is part of becoming an earning Operator. If that's new to you, then visit the Become an Operator Guide
Streamr node hardware recommendations
Nodes will consume resources, mainly bandwidth and CPU. RAM usage is moderate and disk usage in negligible. While there are no strict hardware recommendations, 4-8GB of RAM, 3-4 virtual cores, and ideally 1Gbps bandwidth would be a safe bet for participating in most stream Sponsorships.
- A public IP is necessary.
- A TCP port for WebSocket connectivity must be open. The port is configurable and the default is
32200.
Choose your installation method
You have two methods to choose from: Docker or npm. Docker is the easier option.
Once you have either Docker or Node.js installed, the steps to download and start the node are very similar, regardless of whether you’re running Linux, macOS, or Windows (use PowerShell). You may need to adapt the commands for your platform or install OS-specific dependencies if they are missing.
The Streamr node Docker guide
Step 1: Docker preparations
If you are using Windows/PowerShell or macOS and don’t have Docker installed, get Docker Desktop here.
If you're running Linux and need to install Docker, see the Installing Docker in Linux section.
Step 2: Setup a folder for your node
You need a folder for your node where the node's config file will be stored. Create the folder with the following command:
mkdir ~/.streamrDocker
Update the permissions on the node's folder:
sudo chmod -R 777 ~/.streamrDocker/
Step 3: Configure your Streamr node
By using the Config Wizard will initialize your node’s config file, which is saved on disk. The wizard will let you either generate or import an Ethereum private key for your node. Start the Config Wizard with the below command. Docker will download the node image unless you have it already.
Run the config wizard (Linux / macOS instructions)
sudo docker run -it -v $(cd ~/.streamrDocker && pwd):/home/streamr/.streamr streamr/node bin/config-wizard
Windows PowerShell instructions
Change the working directory (move into your node's folder):
cd ~/.streamrDocker
Then run the Config Wizard:
docker run -it -v ${pwd}:/home/streamr/.streamr streamr/node bin/config-wizard
Using the Config Wizard
- The Config Wizard will first ask, would you like to generate or import an Ethereum private key. If you're unsure, choose to generate. If you'd like to use an existing wallet that you're familiar with or your are copying a config from another node then you could choose to import. Node address can be reused in your node fleet, if you choose to run more than one node for redundancy purposes.
- Which network? Choose Streamr 1.0 mainnet + Polygon if you'd like to participate in the rewards. If you'd like to test your node operation with fake tokens then opt for Streamr 1.0 testing environment + Polygon Amoy.
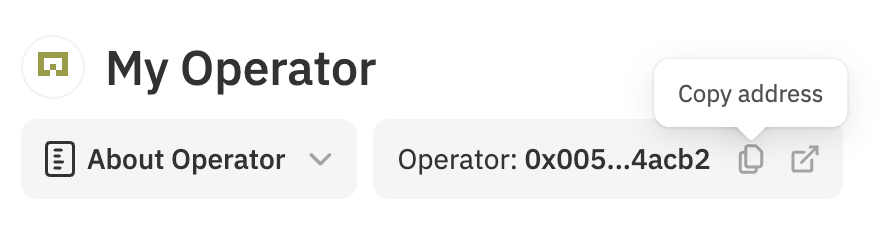
- Do you want to participate in earning? If yes, provide your Operator address. This is found at the top of your Operator page:
- Next, do you want to use your node for other things, like data publishing/subscribing? If you're just here to "mine your bandwidth" then you can decline this option.
- Lastly, select a path to store your config file. Go with what's suggested if you're unsure and save the path for later incase you need it.
The Config Wizard now outputs your node address along with a few links and tips.
It will suggest you to pair your node with your Operator, and to visit this page for the next instructions on how to "turn on" your node.
If you're running a node to become an Operator, then you could now jump back to Step 3 of becoming an Operator to add your Operator contract address into the node config before starting your node.
Step 4: Start your Streamr node
Linux / macOS instructions
sudo docker run -p 32200:32200 --name streamr --restart unless-stopped -d -v $(cd ~/.streamrDocker && pwd):/home/streamr/.streamr streamr/node
Windows PowerShell instructions
First move into your node's folder:
cd ~/.streamrDocker
docker run -p 32200:32200 --name streamr --restart unless-stopped -d -v ${pwd}:/home/streamr/.streamr streamr/node
The docker run command, deconstructed:
The --name option gives the Docker container a custom name, in this case streamr. This makes it easier to check in on your node later. If you don't set a custom name, Docker will automatically give each container a funky name a la nifty_lovelace.
The --restart option enables a restart policy of unless-stopped. This means that if a node stops running due to an error (such as it running out of memory), it will start up again automatically and continue to claim rewards. If you, however, stop a node manually, it won't start again on its own, which is practical in case you need to make changes to the config file before you start it again. You can restart a stopped node manually with the command sudo docker restart streamr (remove sudo if you are using Windows PowerShell).
The -d option starts your Docker container and node in detached mode, meaning it runs in the background and you can check in on and follow the logs as you please. The alternative is to start it in attached mode, which requires you to keep the window open to keep the node running. The latter is not practical in most cases unless you use a terminal multiplexer such as tmux or screen to detach.
Step 5: Follow the node logs
Since you started the node in detached mode, you won't see the log streamed to your screen automatically when you start the node. Run the command below to see and follow the logs.
Remember to stop the logs command. If its left to run in the terminal it will consume a large amount of memory over time.
Linux / macOS instructions
sudo docker logs --follow streamr
Windows PowerShell instructions
docker logs --follow streamr
You should start to see logging similar to this:
INFO [2023-12-08T08:56:52.131] (StreamrNode              ): Start Streamr node version x
INFO [2023-12-08T08:56:53.438] (AutoCertifierClient      ): updateSubdomainIp() called for xyz.streamr-nodes.xyz
INFO [2023-12-08T08:56:54.022] (AutoCertifierClient      ): 2147483647 milliseconds until certificate update
INFO [2023-12-08T08:56:54.302] (StreamrNode              ): Starting new StreamrNode with id 24c8eb0e9f3a46a98c0
Hit CTRL-Z to exit. The node will keep running in the background.
See Docker's documentation to learn more about how to use the docker logs command.
:::
The Streamr node npm guide
Step 1: Install the recommended version using npm
If you don’t have Node.js installed, install it using nvm or manually from the Node.js site. The Streamr node requires at least Node.js version 16.x. Once installed, you can download, configure, and start the Streamr node.
- Run
npm install -g @streamr/nodeto download and install the package. You may need administrative access to run this command. The recommended version may be different to the version listed here, if in doubt, check the npm registry.
To install the Streamr node, run,
npm install -g @streamr/node
There can be plenty of output from npm. If the installation fails with an error, you should address it before continuing.
Step 2: Configure your node
To activate the Config Wizard, run,
streamr-node-init
Using the Config Wizard
- The Config Wizard will first ask, would you like to generate or import an Ethereum private key. If you're unsure, choose to generate. If you'd like to use an existing wallet that you're familiar with or your are copying a config from another node then you could choose to import. Node address can be reused in your node fleet, if you choose to run more than one node for redundancy purposes.
- Which network? Choose Streamr 1.0 mainnet + Polygon if you'd like to participate in the rewards. If you'd like to test your node operation with fake tokens then opt for Streamr 1.0 testing environment + Polygon Amoy.
- Do you want to participate in earning? If yes, provide your Operator address. This is found at the top of your Operator page:
- Next, do you want to use your node for other things, like data publishing/subscribing? If you're just here to "mine your bandwidth" then you can decline this option.
- Lastly, select a path to store your config file. Go with what's suggested if you're unsure and save the path for later incase you need it.
The Config Wizard now outputs your node address along with a few links and tips.
It will suggest you to pair your node with your Operator, and to visit this page for the next instructions on how to "turn on" your node.
If you're running a node to become an Operator, then you could now jump back to Step 3 of becoming an Operator to add your Operator contract address into the node config before starting your node.
Step 3: Start the Streamr node
To start your Streamr node, run,
streamr-node PATH_TO_CONFIG_FILE
You should start to see logging similar to this:
INFO [2023-12-08T08:56:52.131] (broker                   ): Start Streamr node version x
INFO [2023-12-08T08:56:53.438] (AutoCertifierClient      ): updateSubdomainIp() called for xyz.streamr-nodes.xyz
INFO [2023-12-08T08:56:54.022] (AutoCertifierClient      ): 2147483647 milliseconds until certificate update
INFO [2023-12-08T08:56:54.302] (NetworkStack             ): Starting node with id 24c8eb0e9f3a46a98c0
Mainnet node config
Below is the template you can use to override and replace the contents of your config file with. The node config file (typically located at ~/.streamrDocker/config/default.json) and can be edited with a text editor like nano.
If you intend to test your Operator in the Amoy testnet environment, then the above advice applies, but use instead the Amoy config.
You can copy this snippet or download the JSON file.
{
    "client": {
        "auth": {
            "privateKey": "NODE_PRIVATE_KEY"
        },
        "environment": "polygon"
    },
    "plugins": {
        "operator": {
            "operatorContractAddress": "OPERATOR_CONTRACT_ADDRESS"
        }
    }
}
Troubleshooting
Ask for help on our Discord! There are many helpul node runners that have encountered the same issues that you have and will warmly offer their peer-to-peer assistance!
Note, The Network Explorer does not yet support the 1.0 network, your node will not appear on the map.
Also, ChatGPT is a handy resource for debugging networking and Docker related issues.
RPC issues
Your node may have issues if the RPC connection is flaky. The RPC is the connection to the Blockchain.
Operators may choose to replace their RPC endpoint address by updating their node config file.
Diagnostics
For extra logging on your Streamr node, add the LOG_LEVEL environmental variable to your run script.
For example,
sudo docker run -p 32200:32200 --name streamr --restart unless-stopped -d -e LOG_LEVEL=trace -v $(cd ~/.streamrDocker && pwd):/home/streamr/.streamr streamr/node
Amoy node config
Below is the template you can use to override and replace the contents of your config file with. You can copy this snippet or download the JSON file.
- This is the Amoy configuration. Use the Mainnet configuration if you'd like to stake and earn on Polygon with real tokens.
{
    "client": {
        "metrics": false,
        "auth": {
            "privateKey": "NODE_PRIVATE_KEY"
        },
        "environment": "polygonAmoy"
    },
    "plugins": {
        "operator": {
            "operatorContractAddress": "YOUR_OPERATOR_CONTRACT_ADDRESS"
        }
    }
}
Installing Docker in Linux
Note that Ubuntu is the recommended Linux distribution, but the commands should work as-is on most Debian derivatives.
If you are not sure if you have Docker installed, run the following command:
docker -v
If that returns a Docker version, you are good to go. If, however, the response is something along the lines of "The command 'docker' could not be found", go ahead and install Docker with the following commands.
First check if you have curl installed:
curl --version
If you get a response saying "command not found", install curl:
sudo apt update ; sudo apt install curl
Download the Docker install script:
curl -fsSL https://get.docker.com -o get-docker.sh
Run the install script:
sudo sh get-docker.sh
Docker's install script also installs all required dependencies.
When you have Docker installed, you can download, configure, and start the Streamr node.